
Salesforce, Salesforce Tips and Tricks
Cybersecurity Awareness Month 2026: A Checklist for IT Directors Evaluating Their MSP
October 06, 2026
Read Now.svg)

July 7, 2026
.svg)
.svg)


Email is one of the most important communication channels in Salesforce—and one of the most common sources of frustration when something goes wrong.
Maybe Flow-generated emails aren't sending. Maybe users report that messages are landing in spam folders. Or perhaps you've inherited an org where nobody remembers how email authentication was originally configured.
The good news is that most Salesforce email delivery issues can be traced back to three foundational components:
💡 This is the first of two guides. Once delivery and authentication are solid, the companion guide covers email branding, Flow-generated email images, and HTML signatures.
Think of these as the foundation of your Salesforce email strategy. If any one of them is missing or misconfigured, users may experience failed delivery, spam filtering, or authentication warnings.
This guide walks through how each component works, how to configure it, and how to coordinate with your IT team to ensure Salesforce emails are delivered successfully.
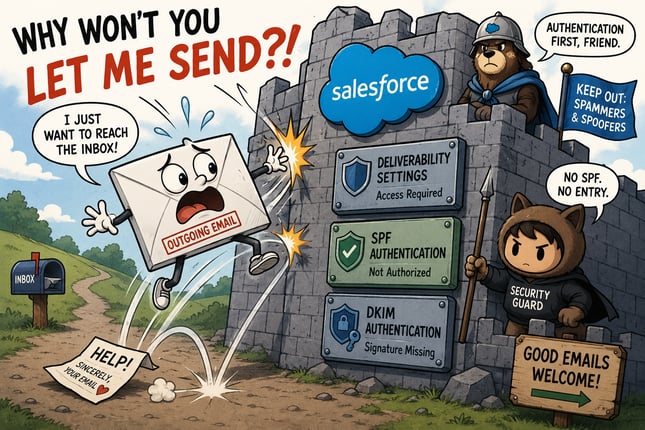
Before Salesforce can send an email, the platform must be configured to allow outbound email. This is controlled by a setting called Email Deliverability, and it's often the first thing administrators check when troubleshooting email issues.
It's important to understand what this setting does—and doesn't do.
Deliverability does not determine whether an email lands in the inbox or spam folder. It only controls whether Salesforce is allowed to send the email at all.
Navigate to: Setup → Email → Deliverability
|
Access Level |
What It Allows |
Typical Use |
|
No Access |
No emails are sent from this org |
Inactive or archived orgs |
|
System Email Only |
Only system emails (e.g., password resets, SF notifications) |
Early sandbox setup |
|
All Email |
All emails, including workflow alerts, flows, and manual sends |
Production and tested sandboxes |
One of the most common causes of email testing issues is the difference between Production and Sandbox defaults.
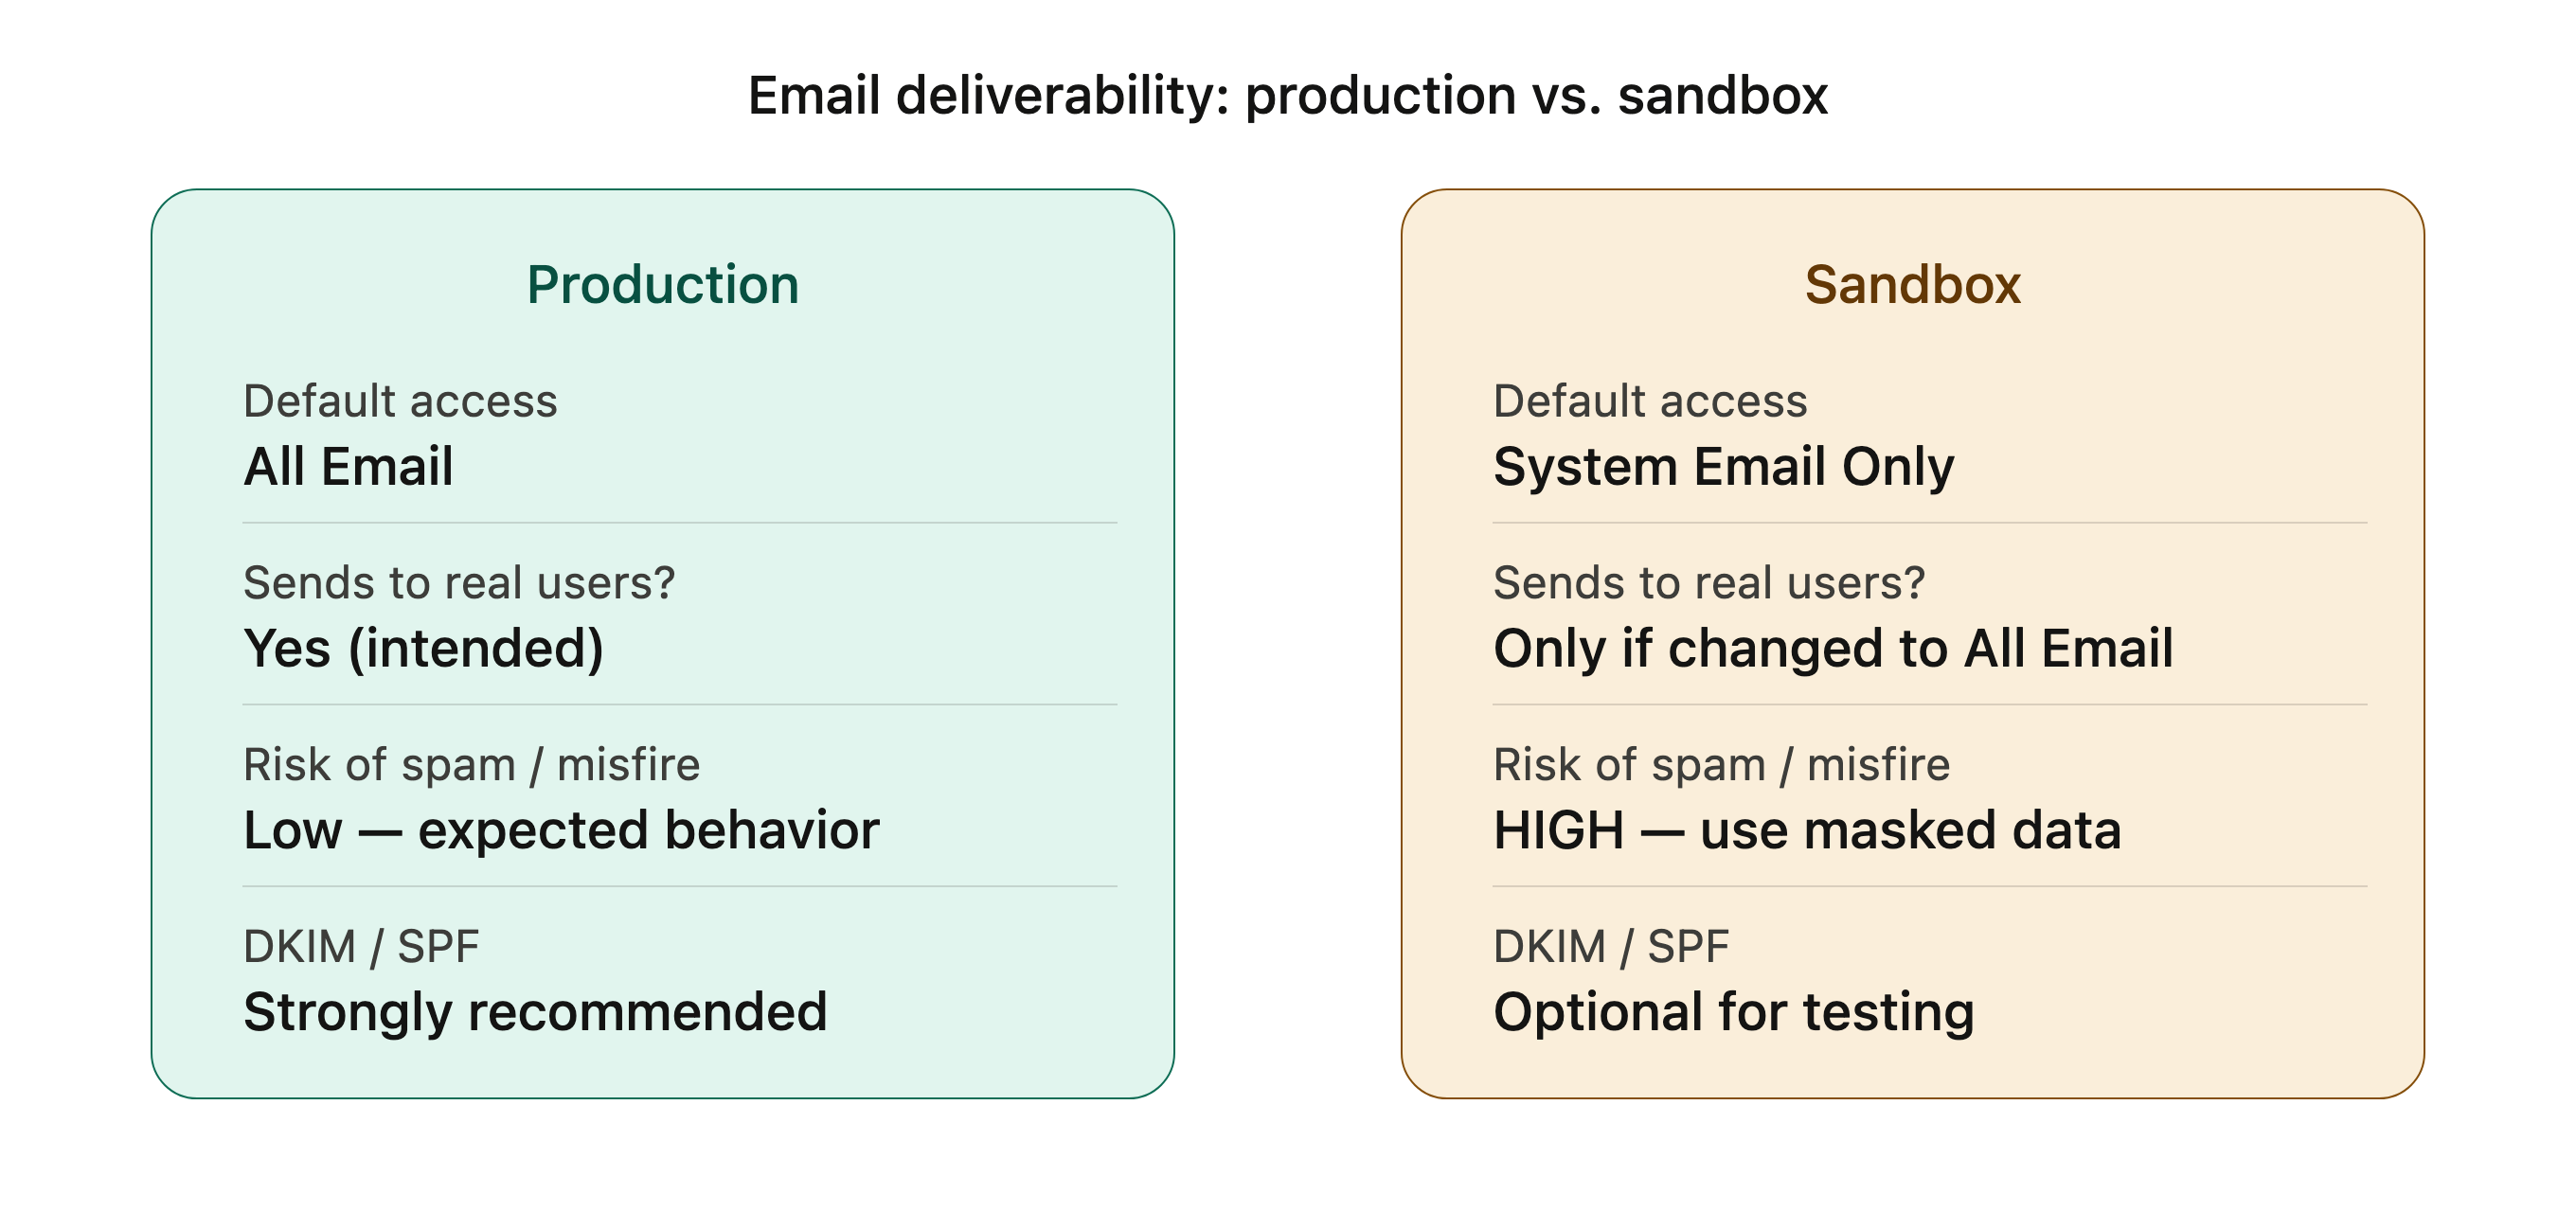
|
Setting |
Production Org |
Sandbox / Developer Org |
|
Default Access Level |
All Email |
System Email Only |
|
Can Send to Real Users? |
Yes |
Yes — but only if changed to All Email |
|
Risk of Emailing Real Contacts |
Low (intended) |
HIGH — must be managed carefully |
|
Recommended for Testing |
No |
Yes — use System Email Only or a test domain |
|
DKIM / SPF Required? |
Strongly recommended |
Optional for testing |
Many admins spend time troubleshooting Flows, Email Alerts, or Approval Processes only to discover the sandbox is still configured for System Email Only.
⚠️ If you change a Sandbox to All Email, Salesforce can send emails to real recipients stored in your data. Always verify that your testing environment contains masked data or controlled test addresses before enabling outbound email.
Salesforce provides a simple way to verify that outbound email is functioning.
Navigate to: Setup → Email → Test Deliverability
Sending a successful test email confirms:
• Deliverability is enabled
• Salesforce can generate outbound email
• Basic mail routing is functioning
If emails arrive in spam folders, the issue is usually not Deliverability itself. Deliverability answers a simple question:
Can Salesforce send the email?
Once that's confirmed, the next challenge is ensuring recipient mail servers trust those emails. That's where SPF and DKIM come in.
💡 If test emails land in spam, that’s a strong indicator that your SPF record or DKIM keys need attention, which is exactly what Part 2 covers.
Part 1 focused on Salesforce itself. Part 2 focuses on the systems receiving your emails.
Modern email providers such as Microsoft 365 and Gmail use authentication standards to determine whether a message is legitimate. Without proper authentication, even a correctly configured Salesforce email may still be flagged as spam.
The two most important standards are SPF and DKIM.
Once Salesforce is permitted to send email, the next step is ensuring recipient mail servers trust those messages. This is where SPF comes in.
SPF (Sender Policy Framework) is a DNS-based email authentication standard that tells receiving mail servers which systems are authorized to send email using your domain. Without it, recipient servers have no reliable way to verify that Salesforce is an approved sender—so emails are more likely to be flagged as spam, quarantined, or rejected entirely.
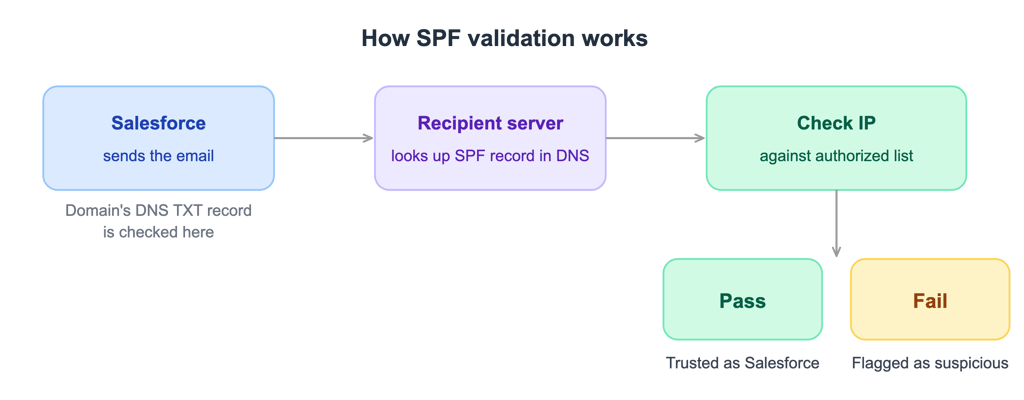
When an email arrives at a recipient's mail server, the server checks the sender's domain and looks up its SPF record in DNS. That record contains a list of systems authorized to send email on behalf of the domain. If Salesforce is included in that list, the email passes SPF validation. If Salesforce is not included, the receiving server may treat the message as suspicious.
Think of SPF as a guest list for your domain. You're telling other mail servers: These are the systems allowed to send email claiming to be from us.
SPF records live in your organization’s DNS, typically managed by IT, a network team, or a domain administrator.
To authorize Salesforce, add the following include statement to your existing SPF record:
include:_spf.salesforce.com
Example:
Before (if using Microsoft 365): v=spf1 include:spf.protection.outlook.com -all
After: v=spf1 include:spf.protection.outlook.com include:_spf.salesforce.com -all
⚠️ Never create a second SPF record. A domain should only have one SPF TXT record—having two will cause SPF to fail.
In most organizations, Salesforce admins don’t have direct access to DNS settings.
A typical process looks like this:
After your IT team updates the DNS record, allow up to 48 hours for propagation. You can verify the change using a free online SPF checker by entering your domain. A correct result will show:
SPF alone won't guarantee inbox placement, but it provides an important layer of trust. Proper SPF configuration helps:
SPF, however, is only half of the authentication story. While SPF verifies who is allowed to send the email, it doesn't verify that the email content remained unchanged after it was sent. That's where DKIM comes in.
Where SPF verifies that Salesforce is authorized to send on your domain’s behalf, DKIM (DomainKeys Identified Mail) adds another layer of trust by digitally signing every message Salesforce sends.
SPF proves who sent the email.
DKIM proves the email hasn’t been modified after it was sent.
Together, they form the foundation of modern email authentication and meaningfully improve deliverability.
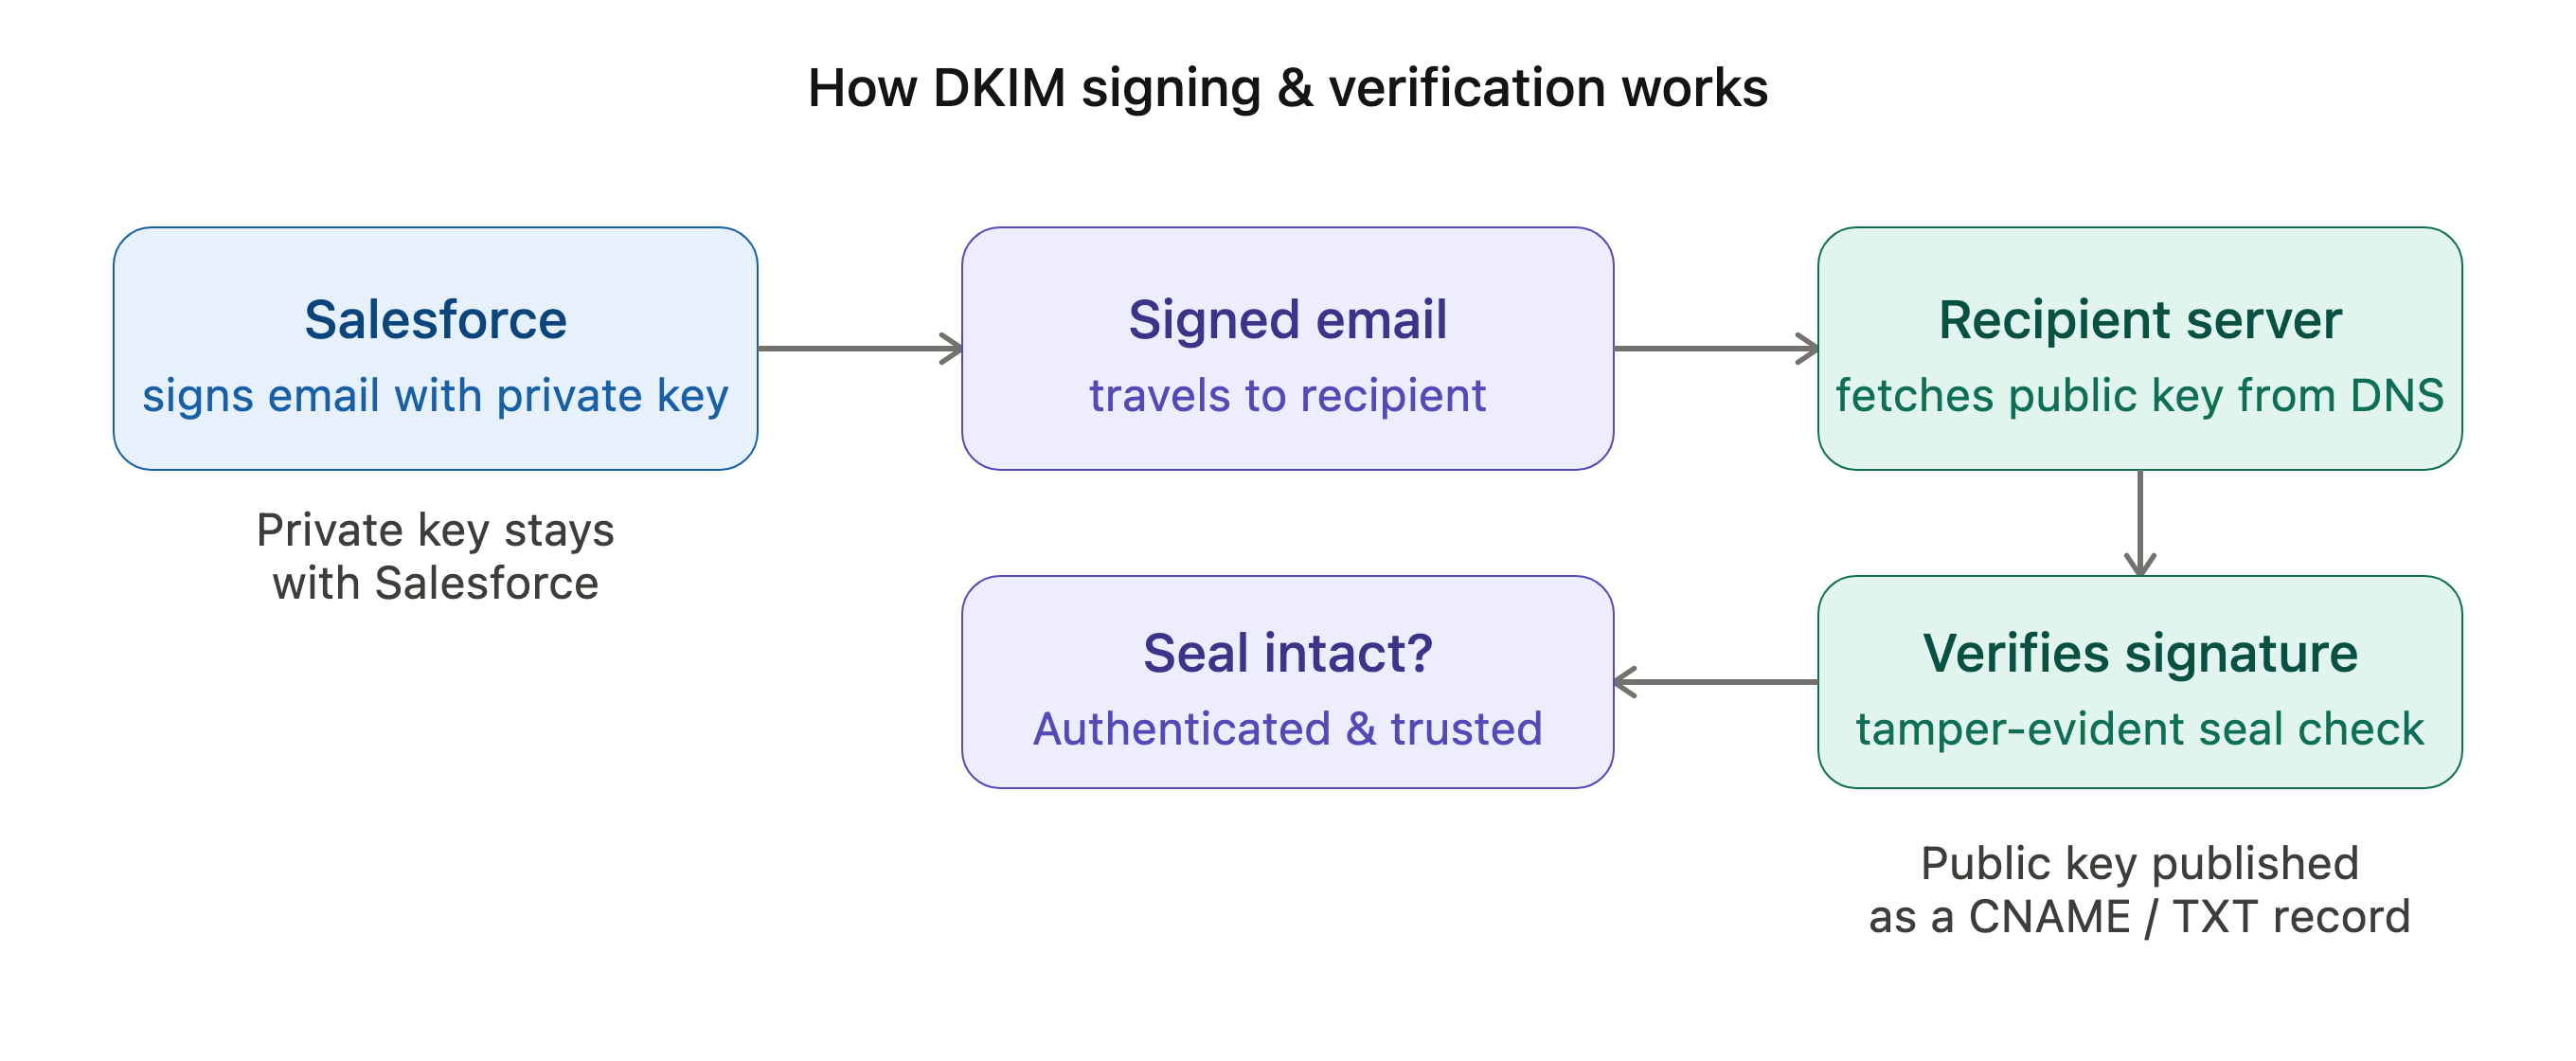
Salesforce holds a private key and uses it to sign each outgoing email. The corresponding public key is published in your DNS. When a recipient’s mail server receives the email, it retrieves that public key and uses it to verify the signature. If the signature checks out, the email is authenticated.
Think of it as a tamper-evident seal: if anything changes after Salesforce sends the email, the seal breaks and the receiving server knows the message was altered.
DKIM setup is a three-phase process coordinated between Salesforce and your IT/DNS team.
Phase 1: Generate DKIM Keys
Navigate to: Setup → Email → DKIM Keys, then click New.
|
Field |
Recommended Value |
Notes |
|
Key Size |
2048-bit |
Preferred for modern security standards |
|
Selector |
sf1 |
Avoid spaces or special characters |
|
Alternate Selector |
sf2 |
Used as a backup selector |
|
Domain |
yourdomain.com |
Domain Salesforce sends from |
|
Domain Match |
Exact Domain |
Most common configuration |
After clicking Save, Salesforce generates two CNAME records.
Don’t activate the keys yet—Salesforce is waiting for the DNS records to be published first.
Phase 2: Publish the CNAME Records to Your DNS
Provide the two CNAME values to your IT team. Each record has:
Your DNS administrator must create both records exactly as provided.
💡 The trailing dot at the end of the Salesforce CNAME target (e.g., “salesforce.com.”) may be required by some DNS providers. Check your existing records to see if other entries include a trailing dot.
DNS propagation can take up to 48 hours. This is a hard wait—don’t attempt to activate DKIM before it completes.
Phase 3: Activate DKIM
After DNS propagation is complete:
Once activated, Salesforce begins signing outbound email using the configured keys.
⚠️ If the Activate button isn’t visible after 48 hours, the DNS records haven’t propagated correctly. Review the CNAME entries with your IT team. If the issue persists after 72 hours, open a Salesforce Support case.
Coordinating SPF and DKIM with IT: The Relay Race
Unlike many Salesforce configurations, SPF and DKIM require a coordinated effort between Salesforce admins and IT Teams. The easiest way to manage it is to treat the process as a simple handoff workflow.
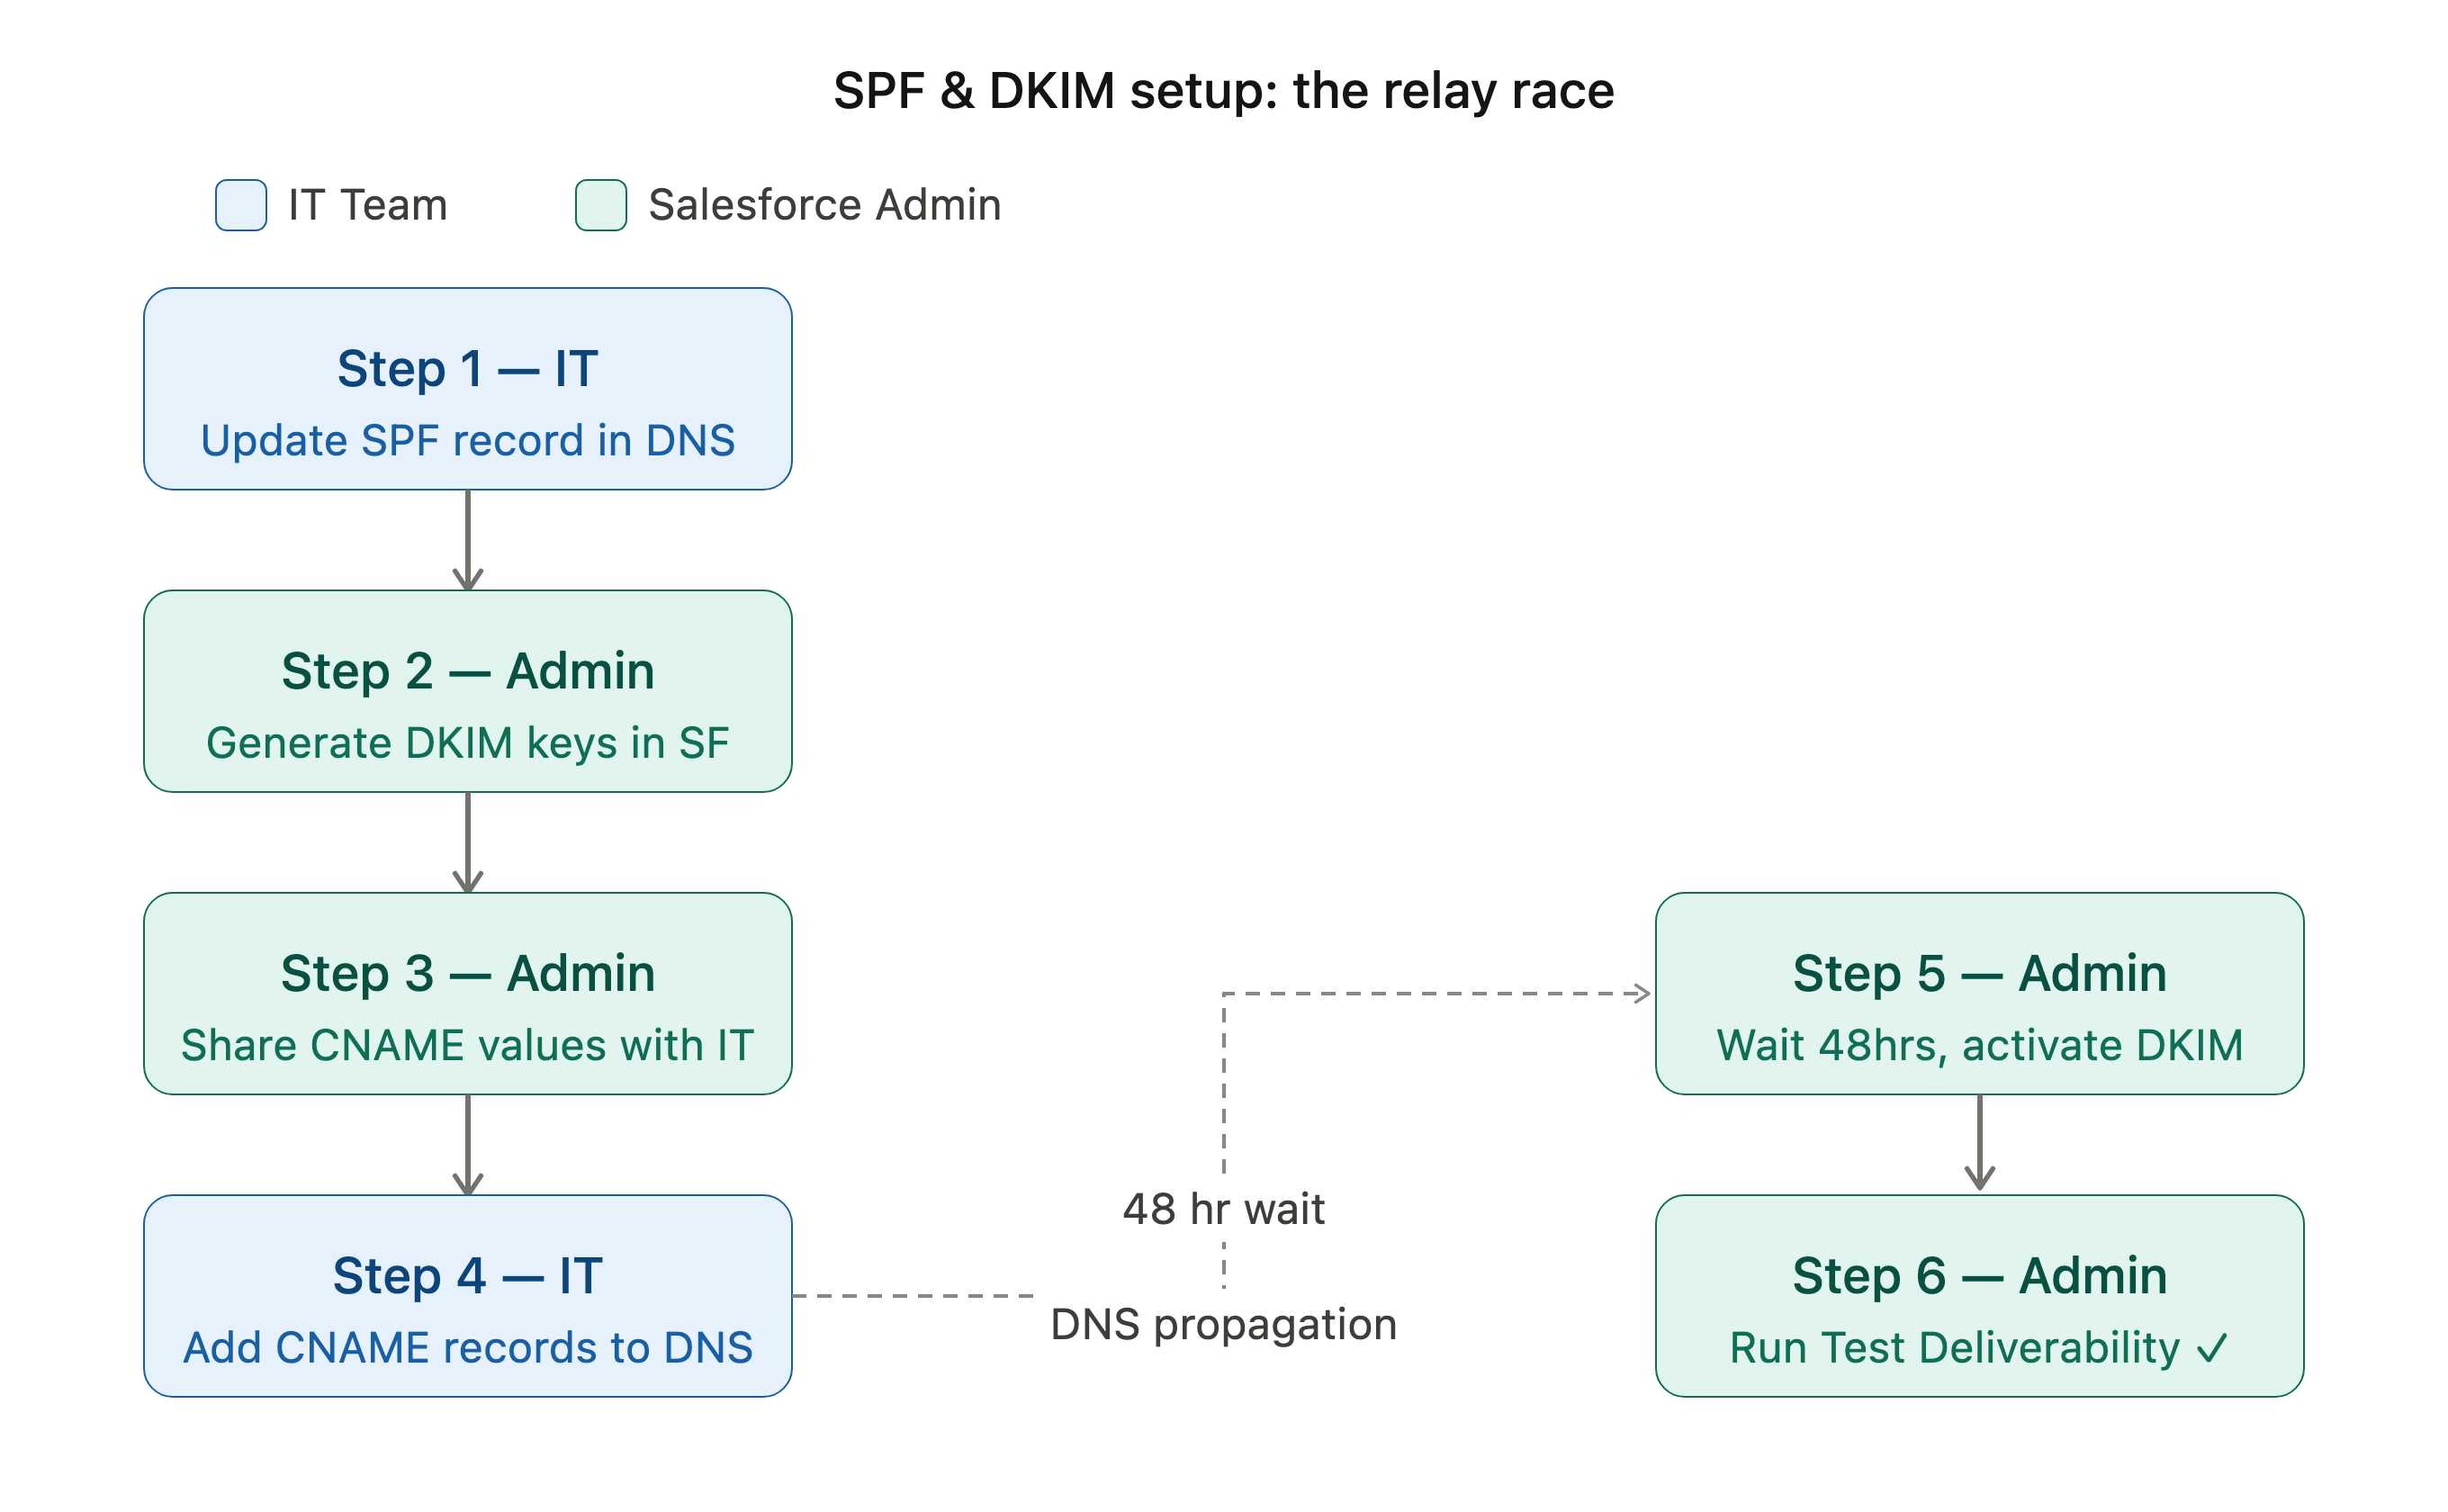
|
Step |
Who Acts |
Action |
|
1 |
IT Team |
Update SPF record to include _spf.salesforce.com |
|
2 |
Salesforce Admin |
Verify SPF configuration, then generate DKIM keys in Salesforce |
|
3 |
Salesforce Admin |
Share the two CNAME values with IT |
|
4 |
IT Team |
Add both CNAME records to DNS; confirm when done |
|
5 |
Salesforce Admin |
Wait 48 hours, then activate DKIM in Salesforce |
|
6 |
Salesforce Admin |
Run Test Deliverability to confirm full authentication |
Organizations occasionally maintain multiple Salesforce Production orgs that send email using the same corporate domain.This is fully supported—the key requirement is that each org uses unique DKIM selectors.
For example:
|
Org |
Selector 1 |
Selector 2 |
|
Production Org A |
sf1prod1 |
sf2prod1 |
|
Production Org B |
sf1prod2 |
sf2prod2 |
Because the selectors are unique, both orgs can publish DKIM records for the same domain without creating DNS conflicts.
💡 Use a selector naming convention that clearly identifies the org responsible for the key. This makes future troubleshooting significantly easier.
Subject: Salesforce Email Authentication Setup – Action Required
Hi Team,
I'm enabling email deliverability in Salesforce and need your help with two DNS updates. This ensures Salesforce-generated emails are properly authenticated and don't get marked as spam.
Step 1 (IT Team): Update SPF Record
Please add include:_spf.salesforce.com to the existing SPF TXT record for our domain. Please do not create a new SPF record.
Step 2 (Salesforce Admin)
Once SPF is updated, I'll generate DKIM keys in Salesforce and send over two CNAME values.
Step 3 (IT Team)
Please add the two DKIM CNAME records to DNS. After propagation, I'll activate DKIM in Salesforce.
Please let me know once Step 1 is complete so we can proceed.
Thank you.
|
Topic |
Key Navigation Path |
Critical Notes |
|
Email Deliverability |
Setup → Email → Deliverability |
Sandbox defaults to “System Email Only” |
|
Test Deliverability |
Setup → Email → Test Deliverability |
Test after each configuration change |
|
SPF Record |
DNS (via IT) |
Add to existing record — never create a second |
|
DKIM Keys |
Setup → Email → DKIM Keys |
Wait 48 hrs after DNS changes before activating |
Final Thoughts
Most Salesforce email delivery issues can be traced back to one of three areas:
When troubleshooting, start with the fundamentals:
Deliverability → SPF → DKIM
Once those three components are configured correctly, Salesforce can reliably deliver authenticated email that recipient mail servers trust. Only after that foundation is in place should you focus on branding, templates, signatures, and the overall user experience.
Stay tuned for Part 2: How to Create a Branded Email Experience in Salesforce
No. Email Deliverability only controls whether Salesforce is allowed to send an email at all — it doesn't determine inbox placement. Even with Deliverability set to "All Email," messages can still be flagged as spam if SPF and DKIM authentication aren't properly configured. Deliverability answers "can Salesforce send this?" while SPF and DKIM answer "does the recipient's mail server trust it?"
SPF (Sender Policy Framework) verifies that Salesforce is authorized to send email on your domain's behalf by checking a DNS record against a list of approved senders. DKIM (DomainKeys Identified Mail) digitally signs each outgoing email so recipient servers can confirm the message wasn't altered after it was sent. SPF proves who sent the email; DKIM proves the email wasn't tampered with. Using both together provides the strongest email authentication.
DNS changes for both SPF and DKIM can take up to 48 hours to propagate. For DKIM specifically, Salesforce won't allow you to activate the keys until the CNAME records have fully propagated — attempting to activate early will fail. If the Activate button still isn't available after 48 hours, double-check the CNAME records with your IT team, and open a Salesforce Support case if the issue persists past 72 hours.


Salesforce, Salesforce Tips and Tricks
October 06, 2026
Read Now

Salesforce, Salesforce Tips and Tricks
October 01, 2026
Read Now

Salesforce, Salesforce Tips and Tricks
September 29, 2026
Read Now